So you want to make your house smart, huh?
There are plenty of choices out there if you want to make your home or business smarter. Everyone has their preference, but I’ve decided to go with Home Assistant due to its massive list of integrations and the fact that I’m a nerd that likes to have complete control over all my toys. This post is going to show how I set up Home Assistant on a Raspberry Pi 4 Model B.
Step 1: Find Your Equipment
There are a few items you’re going to need to get started on this project.
- Raspberry Pi – I went with the Raspberry Pi 4B
- SD Card – You’ll need at least a 32Gb card. Make sure it’s an application type 2 card.
- A Power Supply
- An Ethernet Cable
- SD Card Reader
- Boot Media Imaging Software – I went with Balena Etcher.
At the time of writing this blog post, this step was probably the hardest part of getting started on this project. Raspberry Pi’s are in short supply these days, so you just need to keep checking to see if they are in stock at your preferred retailer. I found mine at canakit.com and ordered it with the case, and all the accessories I’d need for this project.
Step 2: Choose Your Method
There are quite a few ways to install Home Assistant. In this blog we’re going to cover the installation of Home Assistant OS; an OS designed specifically for running Home Assistant. This is the preferred method of install according to the Home Assistant webpage.
Step 3: Create Your Boot Image
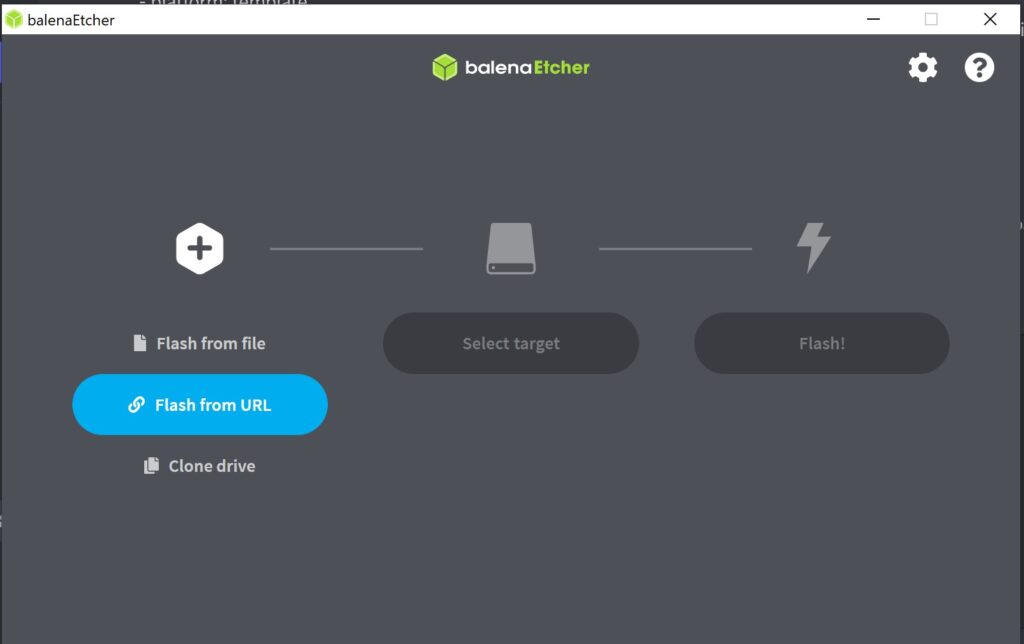
Download Balena Etcher and run it as administrator. When the software loads choose Flash from URL.

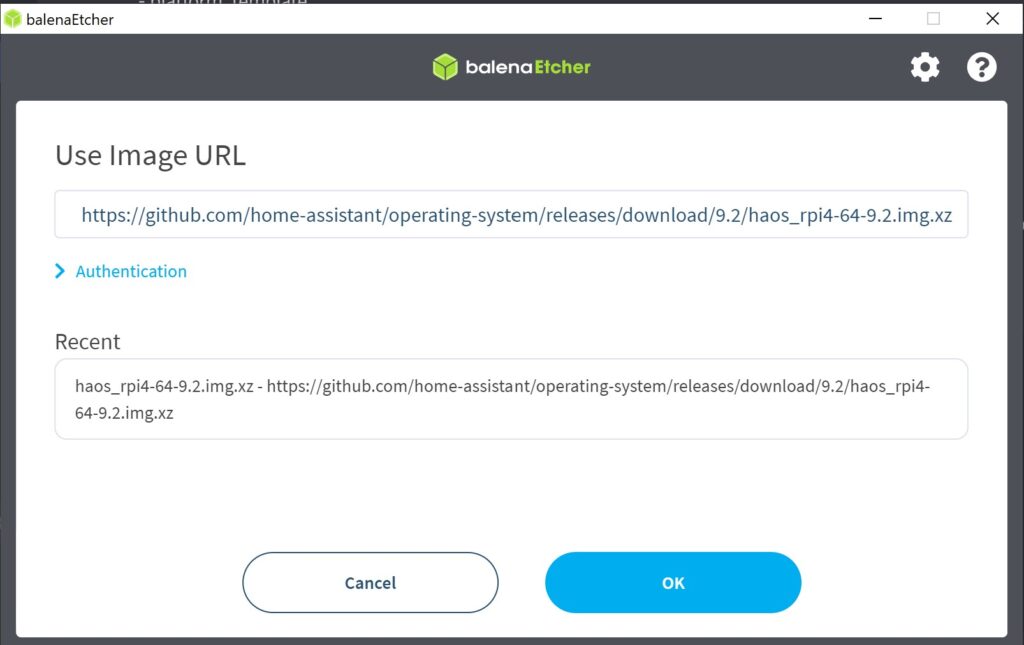
You’ll need to find the appropriate url to download the OS that best fits your use case. I’ll be downloading the Raspberry Pi 4 64 bit OS. You will need to go to the Home Assistant website to find the most up-to-date version of Home Assistant OS. Copy the link into the Use Image URL text field and click OK.

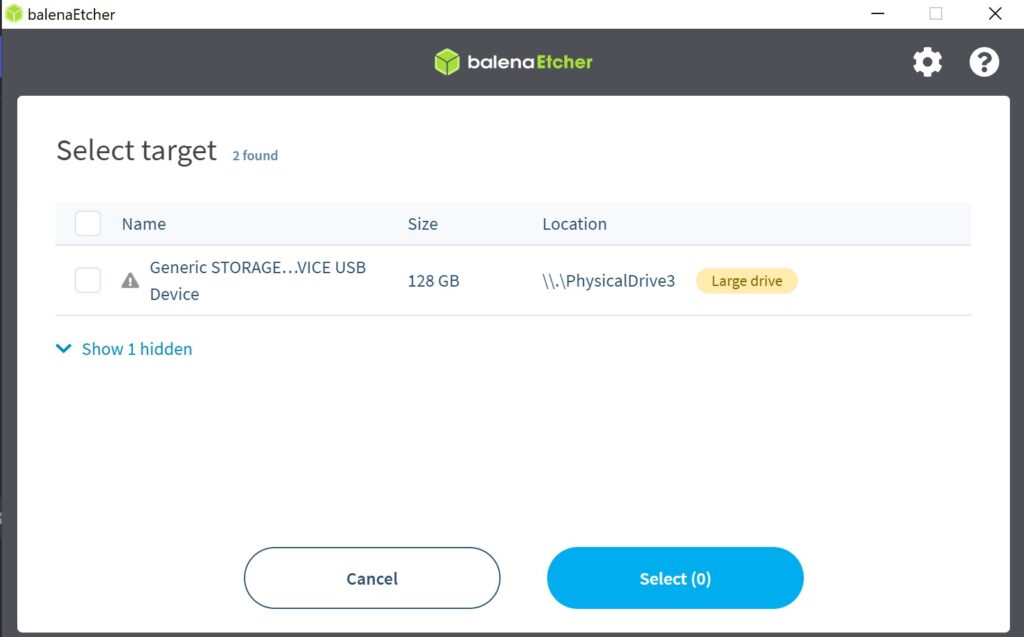
Plug in your SD Card using your preferred SD Card reader. Choose the disk you want to write your bootable image too. You may need to format the SD Card if it’s been used before. Once you’ve chosen the appropriate target, press Select.

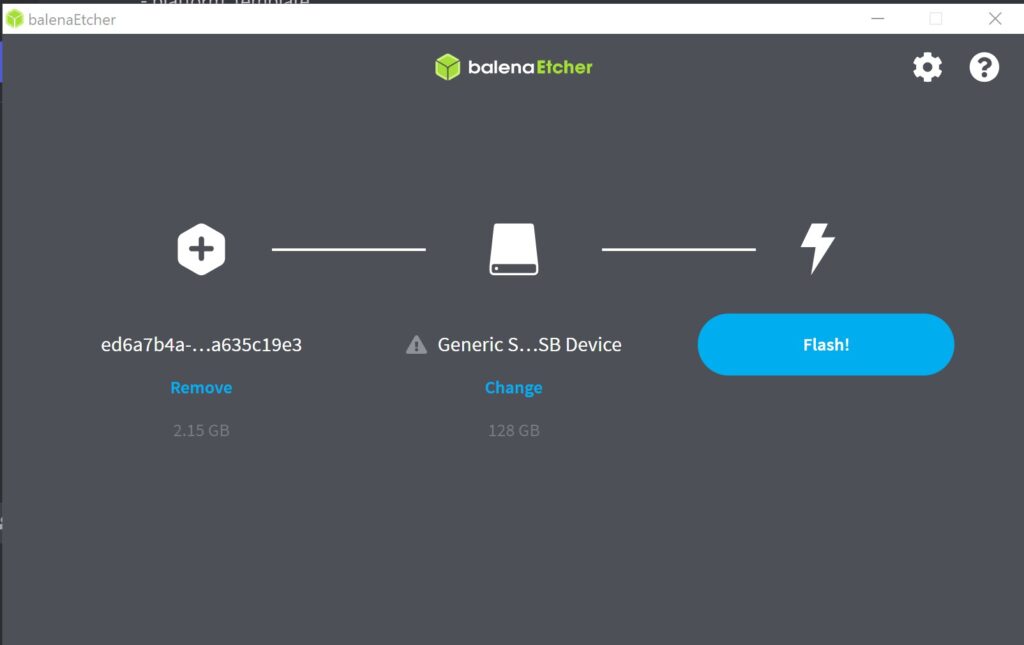
Finally, press the Flash button to begin installing the image on your card. The software will tell you when the process is complete.

Step 4: Start Home Assistant
Put the SD Card you just imaged into the Raspberry Pi. Plug the ethernet cable into your cable router, and then plug in the power. Let the Raspberry Pi boot up. The process will take a few minutes. The next step is to connect to your Pi so you can start configuring Home Assistant. Assuming everything started up ok, simply go to your computer, and type http://homeassistant.local:8123/. You should be taken to a screen where you can set up your admin account for Home Assistant.
Final Thoughts
Congratulations!! You’ve officially taken the first steps to automating your home! Right now, Home Assistant isn’t doing much, but we are ready to start adding in some integrations that will start to build the foundation of your smart home. In the next post in this series, we’ll work on downloading the mobile app so we can use your cell phone for triggers and actions in our automations.

Leave a Reply